
The complete system
Every piece of the system is replaceable and rebuildable. With multiple platform sizes and bushing densities it can be adjusted to fit the riders needs. This simple and robust design works on large adventure bikes or MX/Enduro set ups.
We now offer both rotating and non-rotating platform options. This allows any rider to have a platform option that will work for them.
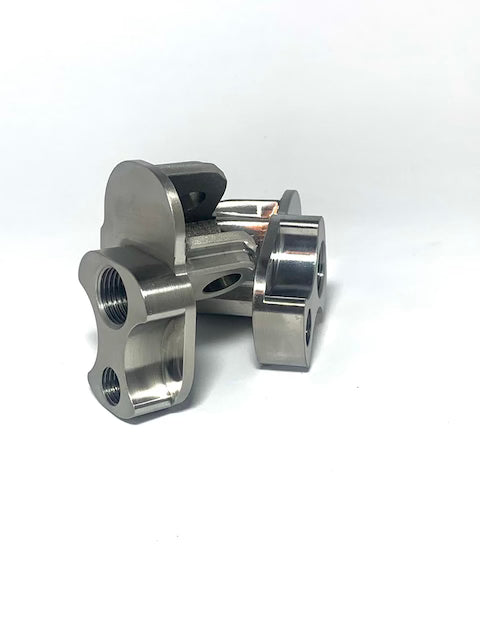
The Mounts
These are made out of stainless steel and carry a Lifetime Warranty. They mount directly to the frame of the bike with a pin. They have two threaded holes that support the spindle and bushing bolt. These are unique designs for specific year make and model bikes.

The Spindle
The Spindle is a time-tested and proven design. Simple, strong, and easy to replace. Each batch of spindles is tensile tested to meet our high-quality control standards. Steel has great fatigue strength when it comes to getting bent. We yield test them to be able to bend 60 degrees without having a shear-break failure. Footpegs tend to take the most abuse out of all the components. We designed our hardware to bend rather than break in a major impact. The idea is that the spindle will bend before the platform you stand on does. This means that the cheapest and easiest part to replace fails rather than the more expensive platform. Plus, keeping a spare spindle in your pack doesn't take up much space and is cheap insurance to make sure your ride doesn't get ruined.
We now offer the Spindle in an upgraded Titanium option. Titanium is roughly half the weight and twice the strength when compared to our chromoly steel spindle. For those looking for the most premium option.

The Bushing Bolt
These Bushing Bolts are grade 12.9 rated and nickel coated. They have a button head design and less chance that they will hit squarely on a rock and bend. A multi-use thread locker has been applied, so you can remove them to change bushings and the thread lock will hold up. Steal has great fatigue strength when it comes to getting bent. Footpegs tend to take the most abuse out of all the components. We designed our hardware to bend rather than break in and major impact.

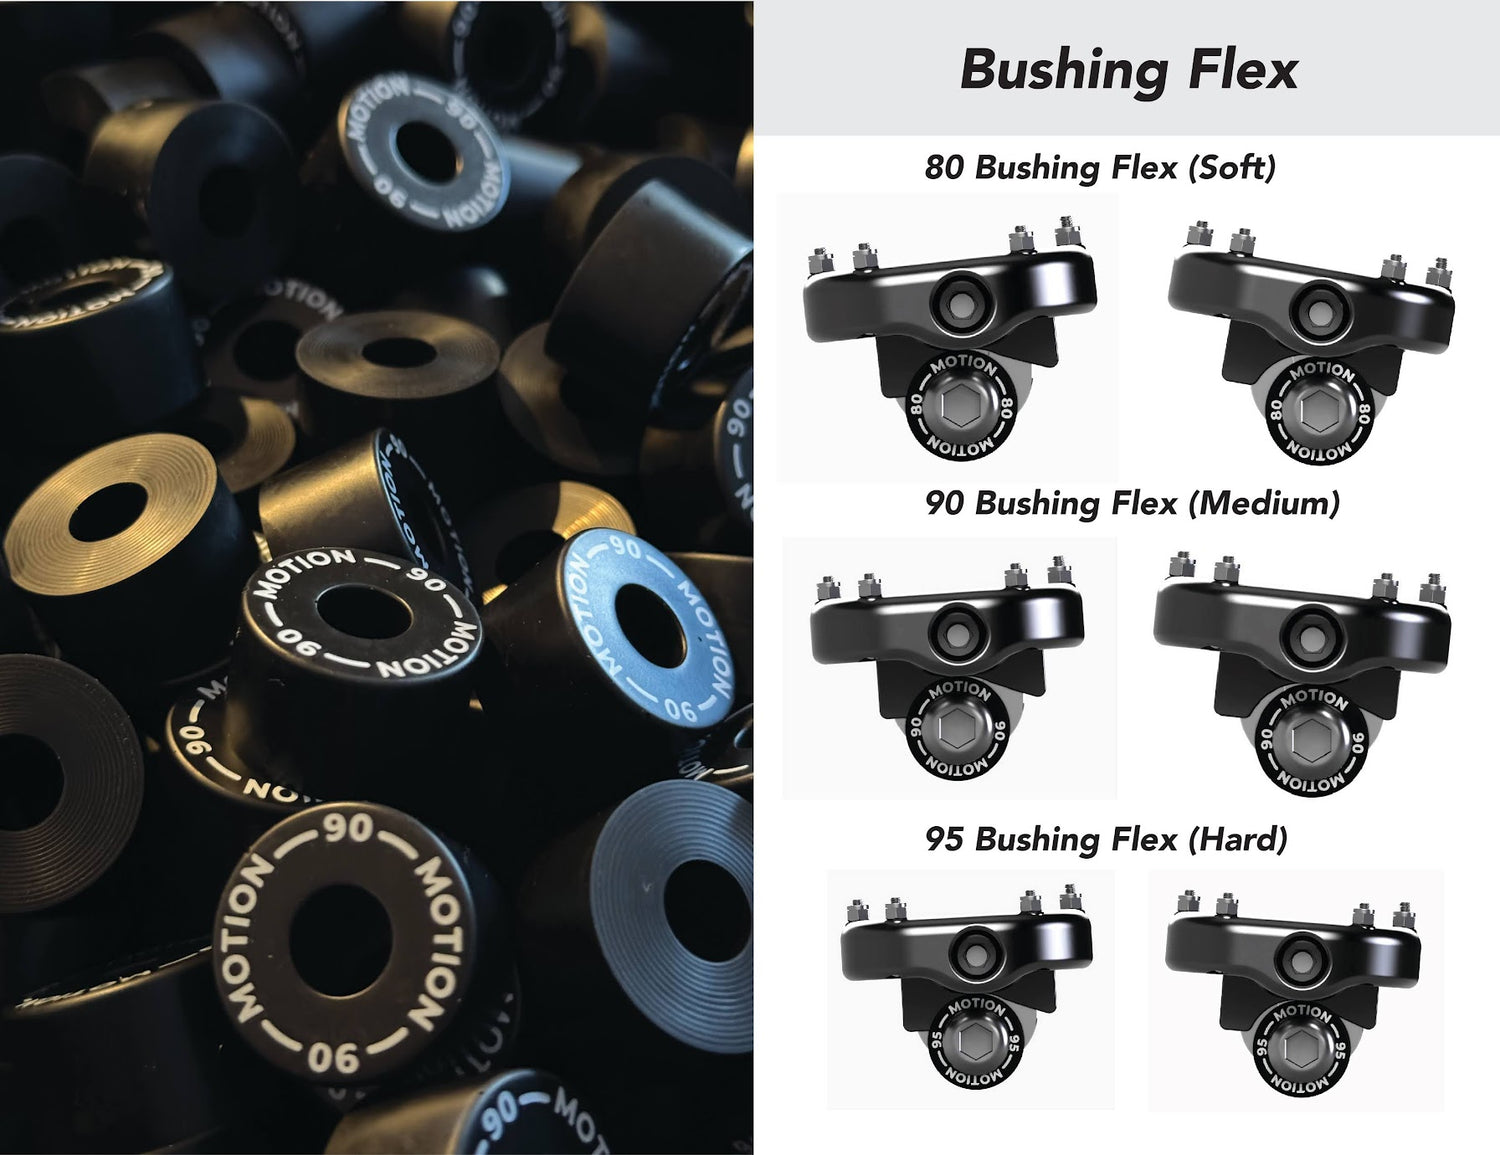
The Bushings
The bushings are a key part of the system. Using a durometer rating of hardness, you can pick what type of flex rating you want for the platforms.
A higher rating means a firmer bushing that will take more weight and force to compress. It’s a simple and effective way of providing shock dampening and absorption. This is nothing new and all modern suspension systems use bushings in the automotive world.
We use bushings from the skateboard industry. They are time tested, high quality, inexpensive, and easy to produce. No need to reinvent the wheel when other industries have already perfected it.
Bushings act similar to cartilage in a joint. It is there to dampen and strengthen the system. Like all things, bushings will need to be replaced as they age and break down. Just like you would replace the oil in a shock as it breaks down over time.

The Platforms
The Platforms come in multiple materials and sizes. You can also use a variety of cleat variations with standard hardware options that can be purchased at your local hardware store or online. The platforms have a universal fit on the spindle and mount so it is easy to change platforms without having to take off the mount from the bike.

Enduro and Magnum Ti Hardware
The non-rotating Enduro and Magnum Ti platforms use bolts that take the place of the spindle and bushing bolt. These are heat-treated to a point that protects the mount and platform from damage when they fail. The goal is not that they will fail (the threads will strip out) before the platform, mount, or mounting tabs on the bike's frame fail.

New Enduro Platforms
The new Enduro platforms offer a traditional non-rotating option. The goal of our flex-mount system is to be the most encompassing mounting system on the market. Offering a platform option for all riders.
The Enduro platforms are built with maximum mud, snow, and dirt clearing in mind. There is also an optional 4 degrees of negative camber adjustment wedge that can be added.
It's a perfect option for those who ride in technical terrain and need a stout and durable footpeg that can hold up to the abuse that this type of terrain dishes out.
Flex-Rating System explained
-
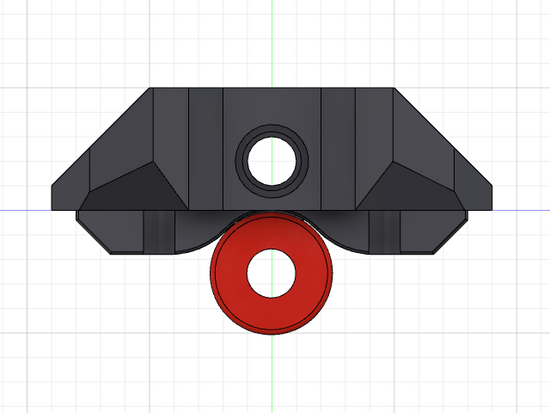
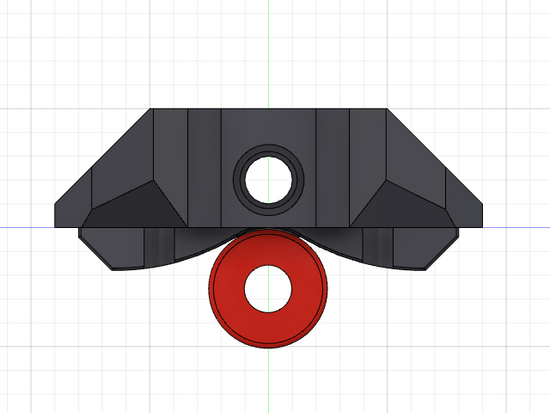
Flex-rating 1-1
With a rating system of 0-10. 0 being the least amount of flex and 10 being the most. This example shows a lot of contact with the bushing and a very limited amount of forward and backward flex or rotation.
-
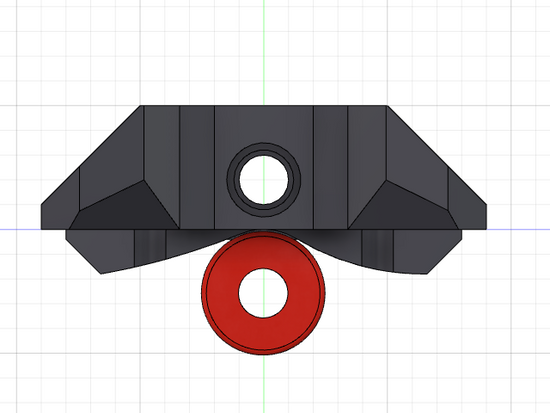
Flex-rating 5-5
As the flex-rating increases there is less contact with the bushing. This creates more flex and rotation as it comes in contact with the busings later in the rotation.
-
Flex-rating 9-5
Many rider prefer more forward flex and less back flex. making it easier to get forward on the bike and harder to get in the back seat. This is an ideal set up for trail riding.


Installation Instructions:
Tools needed: 6mm Allen key. 8mm socket with a 1/4'' ratchet. 14mm wrench.
These instructions are for a complete build-up of the flex-mount footpeg system. Please ignore Steps 3-8 if Pre assembled.
Step 1: Remove the OEM footpeg and keep all mounting hardware. The pins, springs, washers, and cotter pins.
Step 2: Install the MFR mount with the hardware you just removed.
Step 3: Install the spindle with a 14mm wrench and torque to 40 ft/lbs. Apply a high-stregnth thread locker. We recommend VIBRA-TITE 541 joining compound.
Step 4: Install the bushing bolt with 2 bushings on each side with a 6mm Allen key and torque to 30 ft/lbs.
Step 5: Take the platform with the 2 bearings and dust cap installed and slide it onto the spindle. Make sure you remove the 8mm nut before doing this step. Slide until it bottoms out on the spindle.
Step 6: Remove the dust cap from the end of the platform with a 6mm Allen key. Take the 8mm nut and thread it on the end of the spindles loosely with your finger.
Step 7: With an 8mm socket on a 1/4'' drive screw in the nut in a clockwise direction. *WARNING DO NOT OVER-TIGHTEN*. Once you feel the nut bottom out stop tightening and visually inspect the nut. It will be hand-tight no more than 2 ft/lbs of torque. Make sure that all the threads are engaged and the nut sits flush with the end of the spindle.
Step 8: Install the dust cap with a 6mm Allen key. Tighten clockwise and once to feel it bottom out stop tightening. This will also be a hand-tight connection.